Showing posts with label rice. Show all posts

Sunday

Sweet Heat Chicken Fajitas

With it being Cinco De Mayo weekend, Mexican inspired dishes are on the brain!

I love some heat in my meal and when it's paired with something sweet ... I cannot resist! 

This recipe was something that was whipped together while I vacationed in Palm Springs back in March and it is seriously DE-LI-CIOUS! The only thing I did differently when I made this again, was the marinade I used for the Chicken. Which ultimately just ended up enhancing this recipe! 

Taste buds, beware.


Sweet Heat Chicken Fajitas


Let's talk chicken marinade first! You're going to want to let your chicken breast marinade for a good couple hours. The longer the better!


I used equal parts of the items pictures above for the marinade; Sriracha, Franks Red Hot Sauce & Hawaiian Marinade. I had 3 chicken breasts to marinade, so I used approximately 4 Tablespoons of each sauce. Just make sure your chicken breasts (depending on how much you're making) is covered evenly in the marinade.

The primary components to this recipe are the Jalapeño's & Pineapple that you add to the Fajita mixture. The rest is really quite basic.

I prefer to use Red, Yellow or Orange peppers, but feel free to use any color pepper you like. Just don't forget your onion. I strongly recommend Yellow Onion, which has a bit of a sweet flavor. Though, some prefer White Onion (which has a stronger "onion taste") or Red Onion (which can be a bit on the lighter "onion taste" scale, especially once sautéd).


When you start to sauté your veggies, you can start grilling your chicken. I don't have a convenient gas or charcoal grill, so I use my stove top grill. This thing actually works quite great! Obviously you have to have a gas stove and not an electric one, if you want to use one of these. 


I add the Jalapeño and Pineapple after the peppers and onions have softened. Your Jalapeño and Pineapple don't need to soften much, just sauté long enough to combine flavors. I usually let everything sit together on low for about 10 minutes.


Time to eat!

I like to use the 10" tortillas, specifically the "super soft" ones. And then I top the my fajitas with Tapatio Hot Sauce and Low Fat Sour Cream. I will also add a little bit of Mexican Rice as a side when I bring this for lunch to work.


Here's a breakdown of the ingredients and instructions ...


Sweet Heat Chicken Fajitas


Prep Time: 10 Min or Less    Cook Time: 20-25 Min    Servings: 8-10


Ingredients

3                    Boneless/Skinless Chicken Breasts
3-4 Tbsp         Sriracha
3-4 Tbsp         Frank's Red Hot Sauce
3-4 Tbsp         Hawaiian Marinade
2-3                Peppers (color is your choice)
1                    Medium Onion
2                  Whole Jalapeno Peppers
1 1/2 Cups      Diced, Fresh Pineapple
1 Tbsp           Olive Oil (for sauteing)


Instructions

Combining the Srirach, Frank's Red Hot Sauce and Hawaiian Marinade together in a quart size sandwich baggie, along with your chicken breasts. Let this sit overnight or for several hours before cooking.

When you're ready to cook, slice up your peppers and onions. Using 1 Tbsp of Olive Oil in your saute pan, add your peppers and onions and turn your stove on to medium heat.

Start to grill your chicken in what ever manner you've chosen to do so. Each chicken breast should need about 7 min on each side to cook. Time may vary depending on your stove or if you're using an actual charcoal or gas grill, so checking the internal temperature of your chicken is always the best way to ensure it is safe to consume. It is recommended for chicken that the internal temp be at 165 degrees.

Your vegetables should be soft after about 10 minutes. Go ahead and add your pineapple and diced jalapeno peppers (seeds removed - unless you like it REALLY hot), turn your burner down to low and let that sit for no longer than 10 minutes. Stirring every couple of minutes.

Once your chicken is done, let it cool for a couple of minutes before cutting it up in to thin long slices.

Now serve & enjoy!!


------------------------------------------------------------------------------------------------------------------------------------


If you're interested in using one of these indoor smokeless grills, you can purchase one online for about $20. The device is just placed right on top of your burner, as pictured below, and then you add al little water to the base! They work great! 


Please let me know if you make these and what you think! Send me a message or post a comment! I would love to hear from you!

And don't forget to subscribe to my blog!


Until next time,


Crista


Friday

Palm Springs: Part I

Hello everyone!!

Soooo, it turns out that 22 days is a loooooong time to be on vacation and out of my usual routine. But I'd be lying if I said that I didn't adjust well. I am very lucky to have a job where I can take so much time off!

California was beautiful and my remaining time off back here at home, in Minnesota, was nice also. We ended up cranking out some nice weather and you can feel Spring in the air! I almost started my herb seedlings garden, but decided to hold off until this weekend. **Yes, I do plan to blog about my seedling garden and indoor herb garden!**

Now, onto why we're really here ... FOOOOD!

We didn't do as much cooking as I'd honestly hoped or planned on and I was horrible at taking pictures of everything. So ultimately what we have here are instructions on what we made and pictures of the final results, for most everything. One of the recipes (Stuffed Peppers) I am still waiting for the details on from my friend. So please keep checking back for that!


First things first ...

Bloody Mary Bar & Nosh


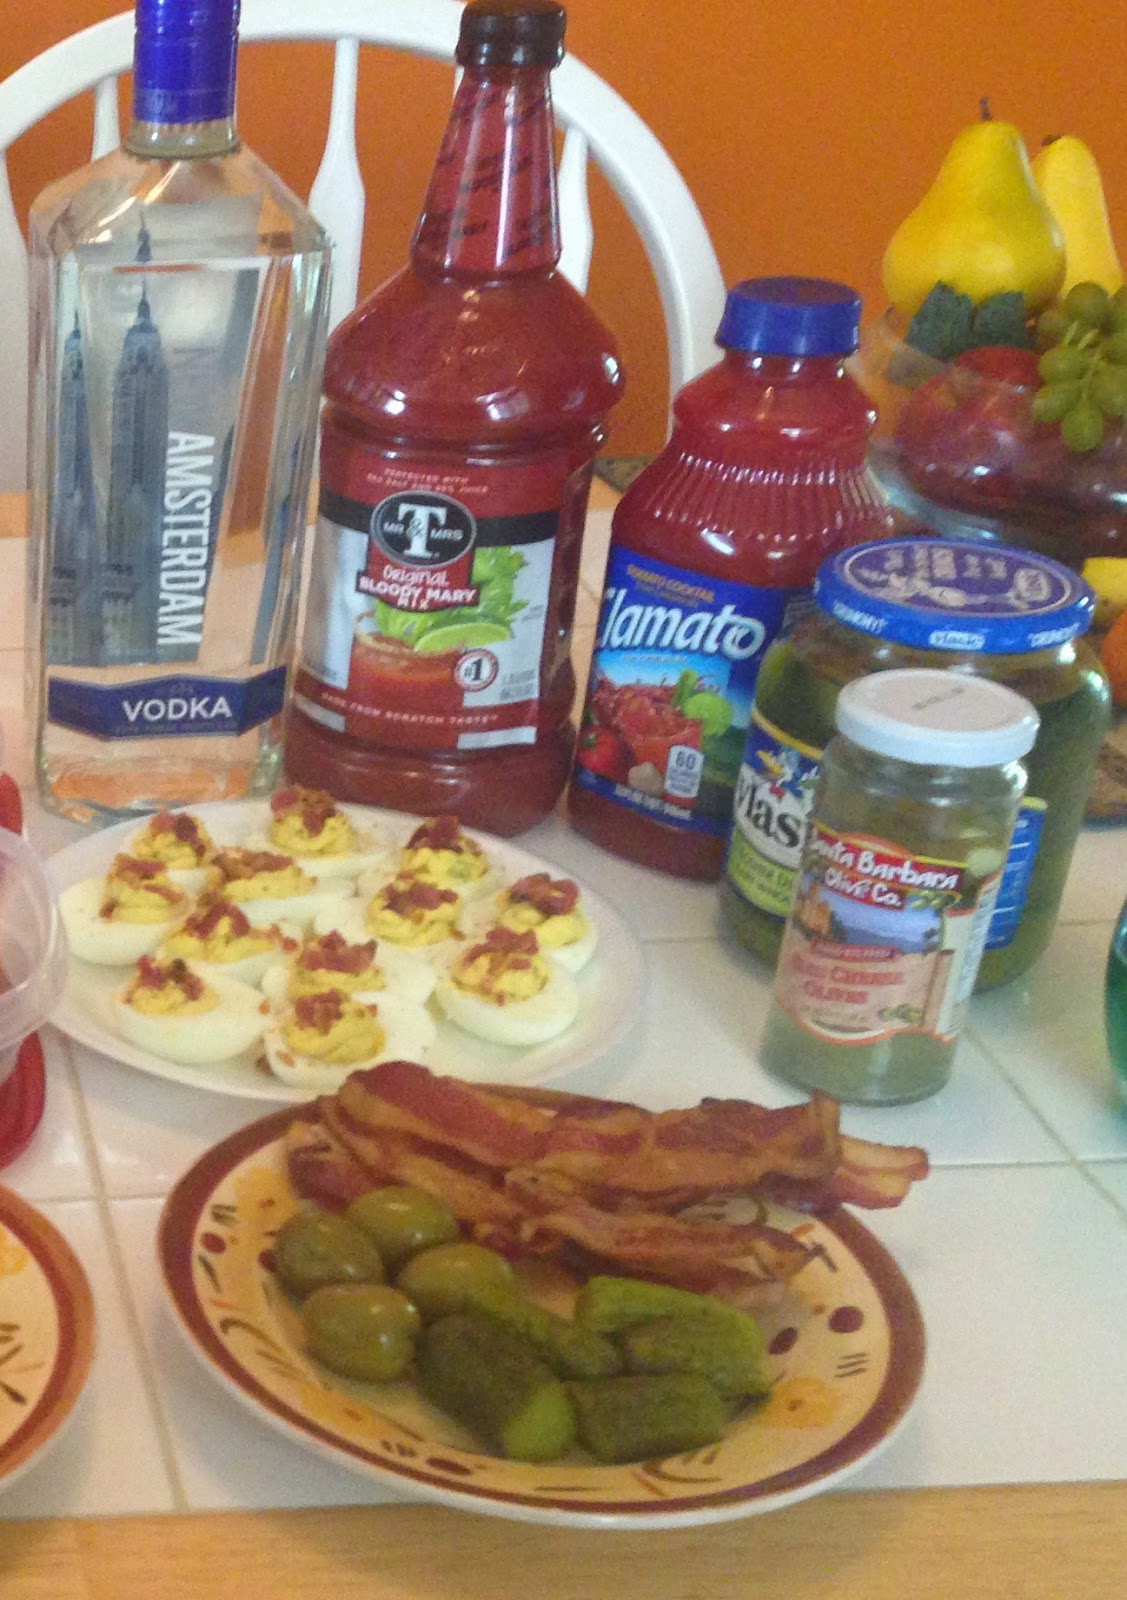
This is my Blood Mary Bar!! And it was intense! Aaaand somewhat difficult to maintain in a house full of 8 people so I did change up the nosh menu often. I would basically just use leftovers from stuff we'd eaten for snacks and lunch to replace some of the random things you see here, but we obviously had the essentials at all times. 


The items you see in the Bloody Mary Bar pictured above are ...
  • Cold Homemade Leftover Pizza Bites
  • Grilled Johnsonville Cheddarwursts
  • Swiss Cheese bites wrapped in Turkey
  • Extra Sharp Cheddar
  • Extra Spicy Pepperjack
  • Blue Cheese Stuffed Dates wrapped in Bacon
  • Deviled Eggs w/ Bacon Sprinkles
  • Bacon Strips
  • Blue Cheese Stuffed Olives
  • Dill Pickles
  • ...and then the obvious (Salt, Pepper, A1 Steak Sauce, Hot Sauce, Climato, etc)


*Please, excuse the quality of these pictures - I literally cropped and zoomed in on these from the original.

For My Deviled Eggs I kind of just winged this one. (I had never made these, so I had asked my boyfriend what he does to his amazing Deviled Eggs and then I just kind of went off on my own with that). So for those I used ...
  • Mustard
  • Mayonnaise
  • Diced up Pickles
  • Paprika
  • Bacon Sprinkles
I used 6 hard boiled eggs, cut them in half and removed the hardened yolk. With my yolk mixture I added about 2 Tablespoons of mustard, 1 Tablespoon of Mayonnaise, 1 large pickle very finely diced and then I sprinkled Paprika and some left over bacon crumbles on the top. If the consistency doesn't look right, just add more Mustard & Mayonnaise, as you see fit.


For my Blue Cheese Stuffed Dates wrapped in Bacon I went off a recipe from Pinterest, but these are about as basic as you can get. I had tried these delicious little buggers at Devil's Advocate in Downtown Minneapolis. We had a Groupon for breakfast and bloodies and this was on a hot skewer! I took one bite and had no idea what it was, so I pulled our server aside and I barely got the words out of my mouth to ask what this delicious little thing was and he knew immediately I was asking about the dates. Trust me, just try them, you won't regret it!

So for these I used ...


  • Bacon
  • Pitted Dates (I got mine in a package and already pitted, found in the baking aisle)
  • Blue Cheese Crumbles


The building process of these is pretty simple! You want to take your bacon slices and cut them evenly in half. Cut open your date down the long side. Stuff some blue cheese crumbles inside and then wrap them closed with the slice of bacon. I suggest setting them on your baking sheet with the fold side down so that the bacon starts to stick to itself during the cooking process. 


Voila!!

The rest of the Bloody Mary Bar is pretty self explanatory and you can really get creative with it. I've seen Bloody Mary Bars where there are all sorts of different pickled vegetables. I once found some pickled baby corn at Target (Market Pantry Brand) and they are really tasty! And if you've ever pickled before you know there are many different things you can pickle! I like to try different types of cheeses and meats on mine.


I'll post Part II ASAP, and we'll take a look at a few of the things we made for dinner!

Here's a sneak peek!! ....


Until next time!


Crista