Showing posts with label pineapple. Show all posts

Saturday

Homemade Pizza

Pizza is one of my favorite meals ... And I can't imagine many wouldn't agree! And what better way to enjoy pizza, than making it at home and putting exactly what you want on it!

I have tried many variations of a homemade pizza, but my favorite is junk pizza with no meat. Although I wouldn't turn down a slice if there was meat on it, because I love pizza that much!

I recognize that homemade pizza is pretty self explanatory, and the need for a "recipe" is moot. But it's still fun to share inspiration and a mutual love for food ... after all, that's why we're here, right!?


Homemade Pizza


I have tried a multitude of crusts and I have so far found my two favorites. Most of the time I like a doughy pizza crust, so I go with Boboli Original Pizza Crust ...


But this time I decided to go with a Thin Fire Roasted Flavor Crust made by Archer Farms, which is found at Target. (You will slowly figure out that I do a majority of my grocery shopping at Target).


I originally bought this crust when I was making pizza for a girls night and needed a few pizzas ... Because this puppy comes with TWO crusts! So if you're entertaining, you can make two different types of pizzas or set the other aside for another pizza night for yourself.

I go pretty classic with my pizza sauce and have found that Ragu's Original Pizza Sauce is where it's at. And when I said that I like junk pizza, I meant it ... I love veggies, I love spicy and I love sweet. So I used the following ...


Fresh Spinach, Red Peppers, Roma Tomato, Mushrooms, Onion, Jalapeno, Pineapple and Fresh Mozzarella.

I dice all my veggies (and fruit) up and place in layers, evenly, on top of the sauce I've spread on my crust. Then I slice approximately 1/4 inch slices of the fresh mozzarella and place it evenly over all the veggies. *Have no fear, upon melting, it will spread more.


Upon baking, I follow the crust packaging instructions, as to not burn the crust. For this crust, it calls for 400 degrees for approximately 12-15 minutes. When all the cheese is melted, I will usually turn off the oven and then turn on the broiler and brown the cheese for a minute or two. I like a soft melted cheese with that golden brown look.


Enjoy your pizza!!!

Friday

Palm Springs: Part I

Hello everyone!!

Soooo, it turns out that 22 days is a loooooong time to be on vacation and out of my usual routine. But I'd be lying if I said that I didn't adjust well. I am very lucky to have a job where I can take so much time off!

California was beautiful and my remaining time off back here at home, in Minnesota, was nice also. We ended up cranking out some nice weather and you can feel Spring in the air! I almost started my herb seedlings garden, but decided to hold off until this weekend. **Yes, I do plan to blog about my seedling garden and indoor herb garden!**

Now, onto why we're really here ... FOOOOD!

We didn't do as much cooking as I'd honestly hoped or planned on and I was horrible at taking pictures of everything. So ultimately what we have here are instructions on what we made and pictures of the final results, for most everything. One of the recipes (Stuffed Peppers) I am still waiting for the details on from my friend. So please keep checking back for that!


First things first ...

Bloody Mary Bar & Nosh


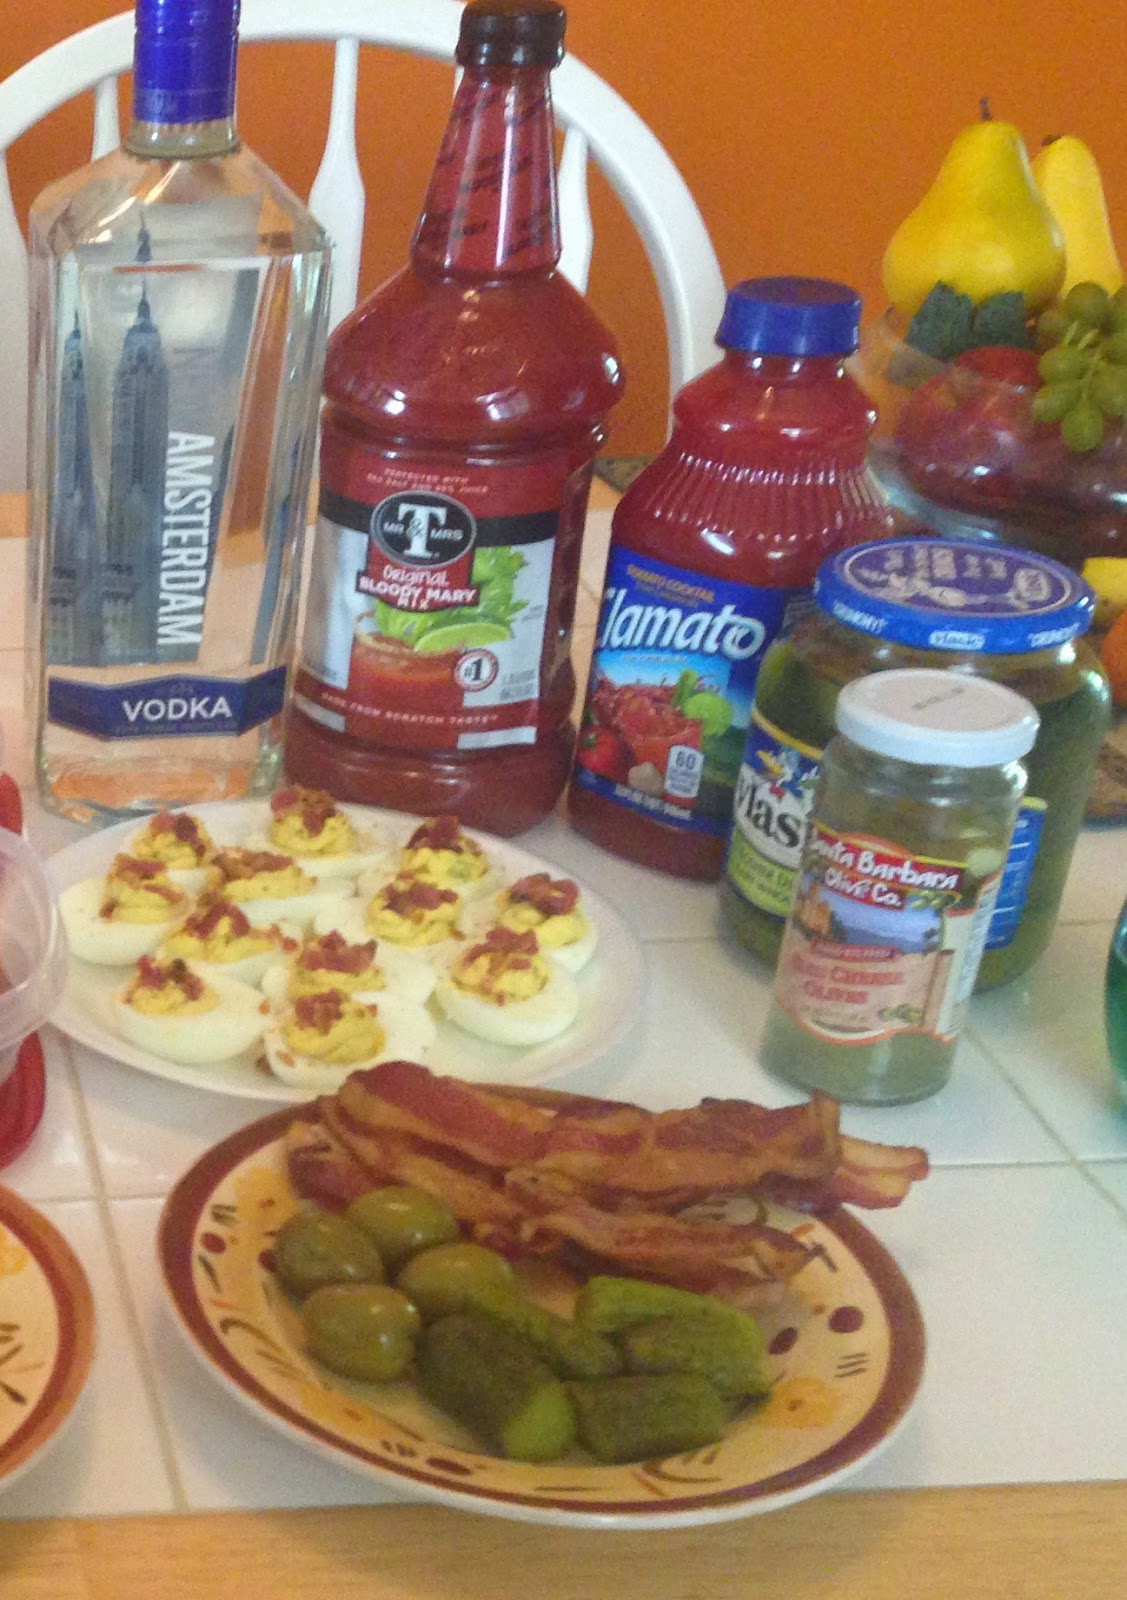
This is my Blood Mary Bar!! And it was intense! Aaaand somewhat difficult to maintain in a house full of 8 people so I did change up the nosh menu often. I would basically just use leftovers from stuff we'd eaten for snacks and lunch to replace some of the random things you see here, but we obviously had the essentials at all times. 


The items you see in the Bloody Mary Bar pictured above are ...
  • Cold Homemade Leftover Pizza Bites
  • Grilled Johnsonville Cheddarwursts
  • Swiss Cheese bites wrapped in Turkey
  • Extra Sharp Cheddar
  • Extra Spicy Pepperjack
  • Blue Cheese Stuffed Dates wrapped in Bacon
  • Deviled Eggs w/ Bacon Sprinkles
  • Bacon Strips
  • Blue Cheese Stuffed Olives
  • Dill Pickles
  • ...and then the obvious (Salt, Pepper, A1 Steak Sauce, Hot Sauce, Climato, etc)


*Please, excuse the quality of these pictures - I literally cropped and zoomed in on these from the original.

For My Deviled Eggs I kind of just winged this one. (I had never made these, so I had asked my boyfriend what he does to his amazing Deviled Eggs and then I just kind of went off on my own with that). So for those I used ...
  • Mustard
  • Mayonnaise
  • Diced up Pickles
  • Paprika
  • Bacon Sprinkles
I used 6 hard boiled eggs, cut them in half and removed the hardened yolk. With my yolk mixture I added about 2 Tablespoons of mustard, 1 Tablespoon of Mayonnaise, 1 large pickle very finely diced and then I sprinkled Paprika and some left over bacon crumbles on the top. If the consistency doesn't look right, just add more Mustard & Mayonnaise, as you see fit.


For my Blue Cheese Stuffed Dates wrapped in Bacon I went off a recipe from Pinterest, but these are about as basic as you can get. I had tried these delicious little buggers at Devil's Advocate in Downtown Minneapolis. We had a Groupon for breakfast and bloodies and this was on a hot skewer! I took one bite and had no idea what it was, so I pulled our server aside and I barely got the words out of my mouth to ask what this delicious little thing was and he knew immediately I was asking about the dates. Trust me, just try them, you won't regret it!

So for these I used ...


  • Bacon
  • Pitted Dates (I got mine in a package and already pitted, found in the baking aisle)
  • Blue Cheese Crumbles


The building process of these is pretty simple! You want to take your bacon slices and cut them evenly in half. Cut open your date down the long side. Stuff some blue cheese crumbles inside and then wrap them closed with the slice of bacon. I suggest setting them on your baking sheet with the fold side down so that the bacon starts to stick to itself during the cooking process. 


Voila!!

The rest of the Bloody Mary Bar is pretty self explanatory and you can really get creative with it. I've seen Bloody Mary Bars where there are all sorts of different pickled vegetables. I once found some pickled baby corn at Target (Market Pantry Brand) and they are really tasty! And if you've ever pickled before you know there are many different things you can pickle! I like to try different types of cheeses and meats on mine.


I'll post Part II ASAP, and we'll take a look at a few of the things we made for dinner!

Here's a sneak peek!! ....


Until next time!


Crista